Connecting to your account on the CCH Computational Resources for executing graphical (GUI) programs:
Most programs you will be using on the CCH Computational Resources involve some sort of graphical interaction. This means a simple ssh connection through the terminal is not sufficient. Most networks are fast enough to support executing graphical programs remotely. After completing the ssh key setup, you now need to tell ssh how to transfer GUI traffic over the ssh connection. The method differs depending on your operating system. The approach requires the use of ssh again, which provides authentication, a TCP/IP transport layer for other commands, and encryption of all network traffic between you and the CCH computational resource.Linux/Mac client with X11 server:
- To transport GUI traffic from a Linux server to your local Linux host or Mac computer, you can simply tell ssh to perform X11 forwarding by adding the "-Y" switch, and adding the "-C" switch to provide additional network compression for faster service:
ssh -YC user@cch.uleth.caOnce logged in, you can issue GUI commands directly on the remote server and the GUI applications will display on your local X11 server. PLEASE NOTE: This may be obvious, but you must be running an X11 environment locally for this to work. Just booting into a text terminal console on your local PC is not workable, you will need to run a KDE or GNOME window manager. In addition, not all GUI programs may work correctly when used this way.
Linux/Mac/Windows client (no X11 server needed):
- A slightly faster and more robust alternative, which also works on the latest Windows
versions, is to use VNC (virtual network computing). The uslims.uleth.ca server has a
VNC server built in, and each user on this system has their own GUI display that can be
accessed via VNC. To use it, the display needs to be tunneled through a ssh connection
to your local laptop or desktop. You will forward
the VNC port assigned to you through ssh to your local computer and
then you can connect to it from your local computer directly as if the
VNC server were running on your local computer (to learn how to start a
VNC session for your account please read this
document). To forward your VNC port with ssh, use this approach:
ssh -fNCL
For windows, omit the "-f" switch::localhost: user@cch.uleth.ca ssh -NCL
Let's assume you were assigned VNC display :3 on the CCH compute resource, then you could forward it to your local VNC port 1 like this::localhost: user@cch.uleth.ca ssh -fNCL 5901:localhost:5903 user@cch.uleth.ca
For Windows, omit the "-f" switch:ssh -NCL 5901:localhost:5903 user@cch.uleth.ca
Once you issue this command on your local Linux host, you will be able to connect with your own vncviewer to your local address, for example:vncviewer :1
For newer Macintosh OSX versions, you do not need a separate VNC viewer, it comes with one built in. At the top of the screen, you see the "Go" menu entry in the menu bar. Click on that, and select: "Connect to server". In the dialog that pops up, enter:vnc://localhost:59xx
where "xx" is your display number on the remote server (e.g., 12 in the example above).For older Mac desktops, I recommend RealVNC Viewer.
For Windows, use the UltraVNC client to connect to the local VNC port by entering "localhost:1" for the "server:port" field:
server:port localhost:1 (then click on "Connect")
Older Windows clients without ssh/powershell built-in: (only if the method above does not work)
- On Windows, you will need to use putty to perform the port forwarding, and after establishing the ssh connection, you can connect to your remote VNC server using a local, port-forwarded connection. The first step is to open putty and create a session and configure it:
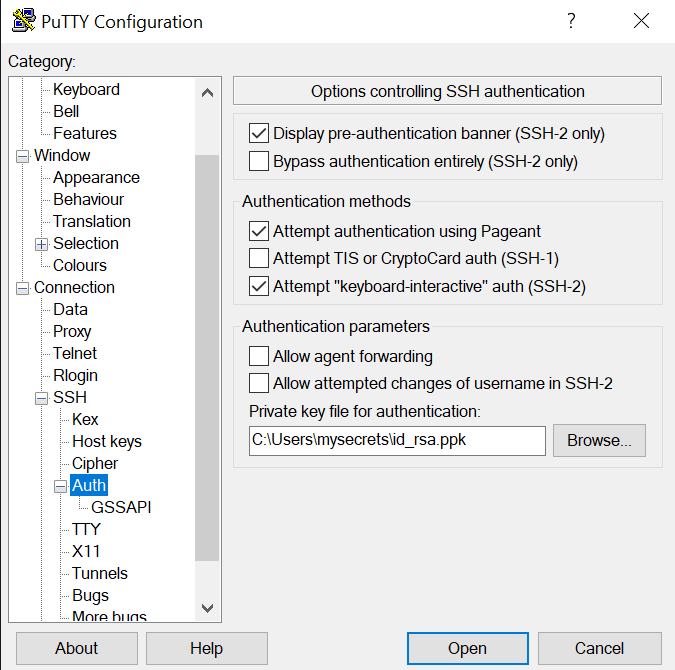
- Create a connection and give it a name that makes sense to you and save it by clicking o the Save button. Next, find +SSH in the left configuration panel and navigate to +Auth and enter your private key as described earlier:
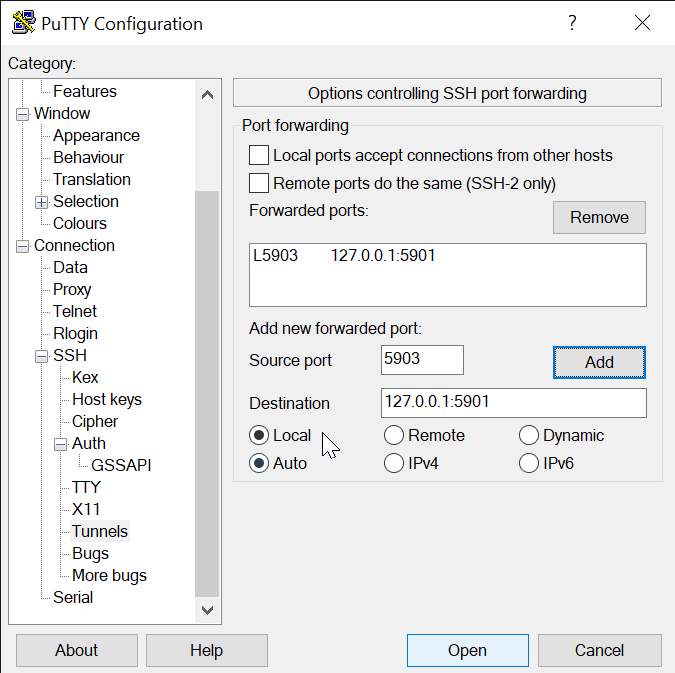
- Next, you need to install the port forwarding rule for this session. Here you need to forward a remote VNC display that was assign to your user account to a local port on your system. Navidate to +SSH and Tunnels:
-
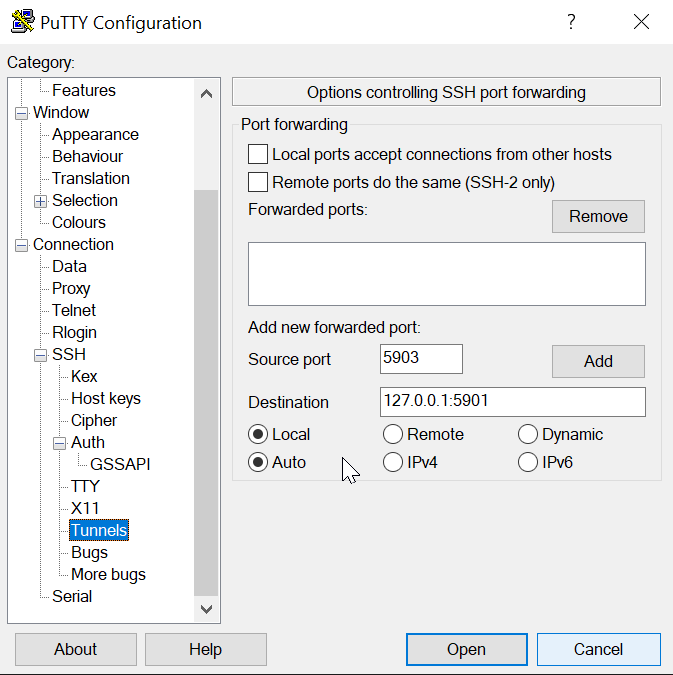
- The purpose for port forwarding is that a secure channel can be used to tunnel the VNC program's commands, and then a local VNC client can be used to interpret the vnc messages into a graphical representation on the local computer. Since only vnc messages are sent, and not entire graphics, the local vncviewer would be faster than the approach discussed here. To add a tunnel to your ssh-VNC session, enter the localhost's IP address (this is always 127.0.0.1) under Destination, followed by a ":" character and the destination port. If you aren't serving another VNC session from your local host, you could just forward to your 5901 port (all VNC ports start from port 5900, where 5900 (display :0) is your local computer's window manager, and 5901 would be display :1. The source port on the remote ssh connection would be the display number assigned to your account on the CCH compute resource. Assuming it is display :3, then the associated source port would be 5903. Enter that under Source Port and click on Add:
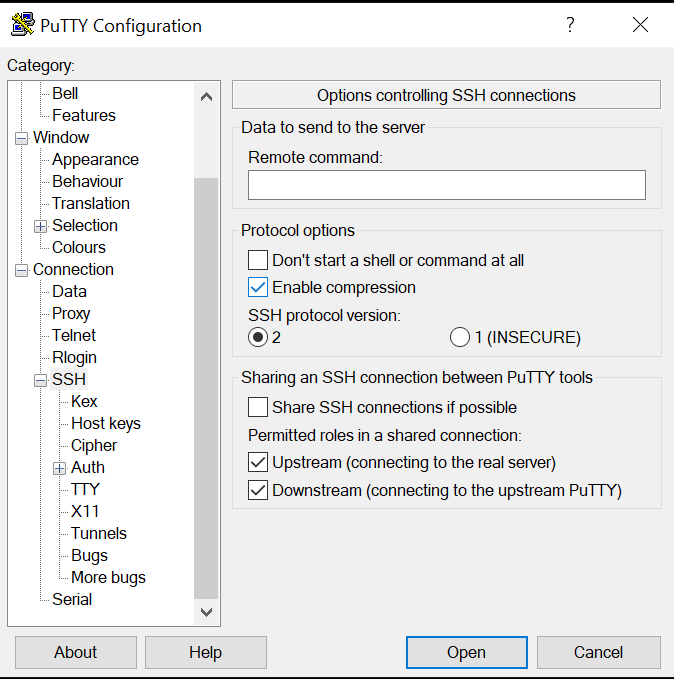
- Next, you can also add compression to speed up your connection even more. Highlight the +SSH option in the left panel and check Enable Compression:
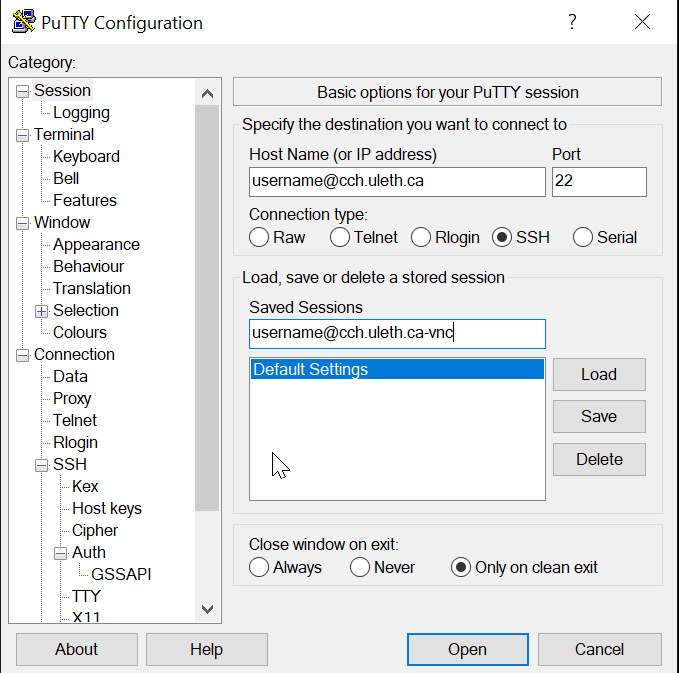
- Finally, navigate back to the Session tab and save your session once more to make sure all changes are committed and saved to your session:
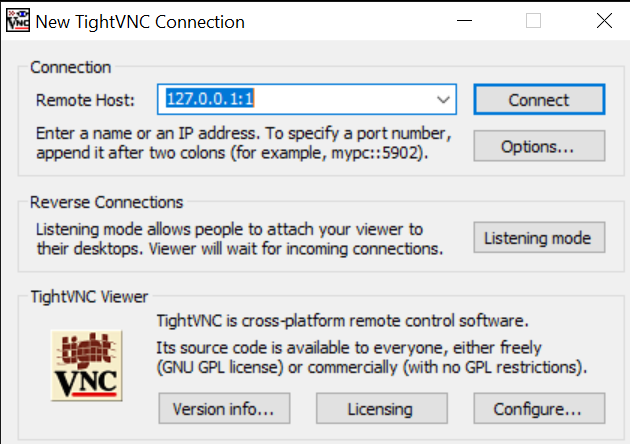
- Mext, open this session and connect to vnc. I recommend to use TightVNC as your client. To connect, open the TightVNC viewer and enter the local destination address: